• The Smarter Way to Restore Concrete & Asphalt in 2026

    The Smarter Way to Restore Concrete & Asphalt in 2026

    Concrete and asphalt are among the largest investments on any property — yet they’re often treated with short-term fixes that fail far sooner than expected. Thin sealers wear off, cracks return, and moisture finds its way back in, leading to repeated repairs and rising maintenance costs.

    At Private Label Coating (PLC), we believe smarter planning leads to longer-lasting surfaces. That’s why our resurfacing solutions are engineered for long-term performance, not temporary cosmetic improvements.

    Beyond Temporary Fixes

    Traditional sealers and surface coatings sit on top of the slab. Over time, traffic, weather, UV exposure, and temperature changes break them down, leaving surfaces vulnerable again.

    PLC takes a different approach. Instead of thin, short-term coatings, we apply engineered, polymer-modified resurfacing systems that:

    • Reinforce worn concrete and asphalt
    • Improve flexibility to handle movement and temperature changes
    • Seal out moisture that causes cracking and spalling
    • Enhance appearance while restoring performance

    The result is a stronger surface that outlasts conventional sealers by years — not months.

    Advanced Asphalt Restoration (When Replacement Isn’t Necessary)

    Not all asphalt needs to be torn out and replaced. When surfaces are worn but still structurally sound, PLC’s advanced asphalt restoration systems can strengthen and protect them, extending service life and improving appearance without the cost of full replacement.

    This approach helps property owners preserve existing pavement while planning for future upgrades.

    Plan Smarter in 2026

    A proactive maintenance and restoration strategy isn’t just smart budgeting — it’s smart ownership. With the right planning, concrete and asphalt surfaces can remain durable, safe, and visually appealing for decades while reducing surprise repairs and long-term costs.

    If you’re planning for the year ahead, Private Label Coating is here to help you build a restoration and maintenance plan that works for your property today and well into the future.

  • Extreme Heat vs. Concrete: Why Surfaces Fail and How to Restore Them Properly

    Extreme Heat vs. Concrete: Why Surfaces Fail and How to Restore Them Properly

    Concrete is tough, but even concrete has limits. When exposed to extreme temperatures, especially fires reaching 1,200–1,500°F, concrete can undergo a violent failure known as thermal spalling. To property owners, it often looks like the concrete “exploded,” leaving behind fractured layers, missing chunks, and a weakened slab beneath the surface.

    At Private Label Coating (PLC), we specialize in diagnosing and restoring heat-damaged concrete so properties remain safe, stable, and structurally sound. Here’s what really happens when concrete overheats, and how PLC brings it back to life.

    Why Concrete “Explodes” at High Temperatures

    Concrete may look solid, but it’s actually a dense matrix of cement paste, aggregate, and moisture. When intense heat hits the surface, several things happen:

    1. Rapid Moisture Expansion

    Even dry-looking concrete contains moisture deep within its pores. At temperatures around 300–600°F, that moisture turns to steam. At 1,000–1,500°F, the pressure becomes so extreme that the internal steam rapidly expands, and the outer layer is literally blown off the slab. This is what causes that “exploded” or shattered appearance.

    2. Loss of Cement Bond Strength

    Cement paste begins breaking down around 600–800°F, and by 1,200°F the chemical structure is significantly weakened. The surface layer loses its strength and becomes brittle or powdery.

    3. Aggregate Breakdown

    Some aggregates expand or fracture under high heat, further contributing to cracking and spalling.

    4. Steel Reinforcement Stress

    If the slab contains rebar, extreme heat causes steel to expand. This can push against the surrounding concrete, causing additional cracking and delamination.

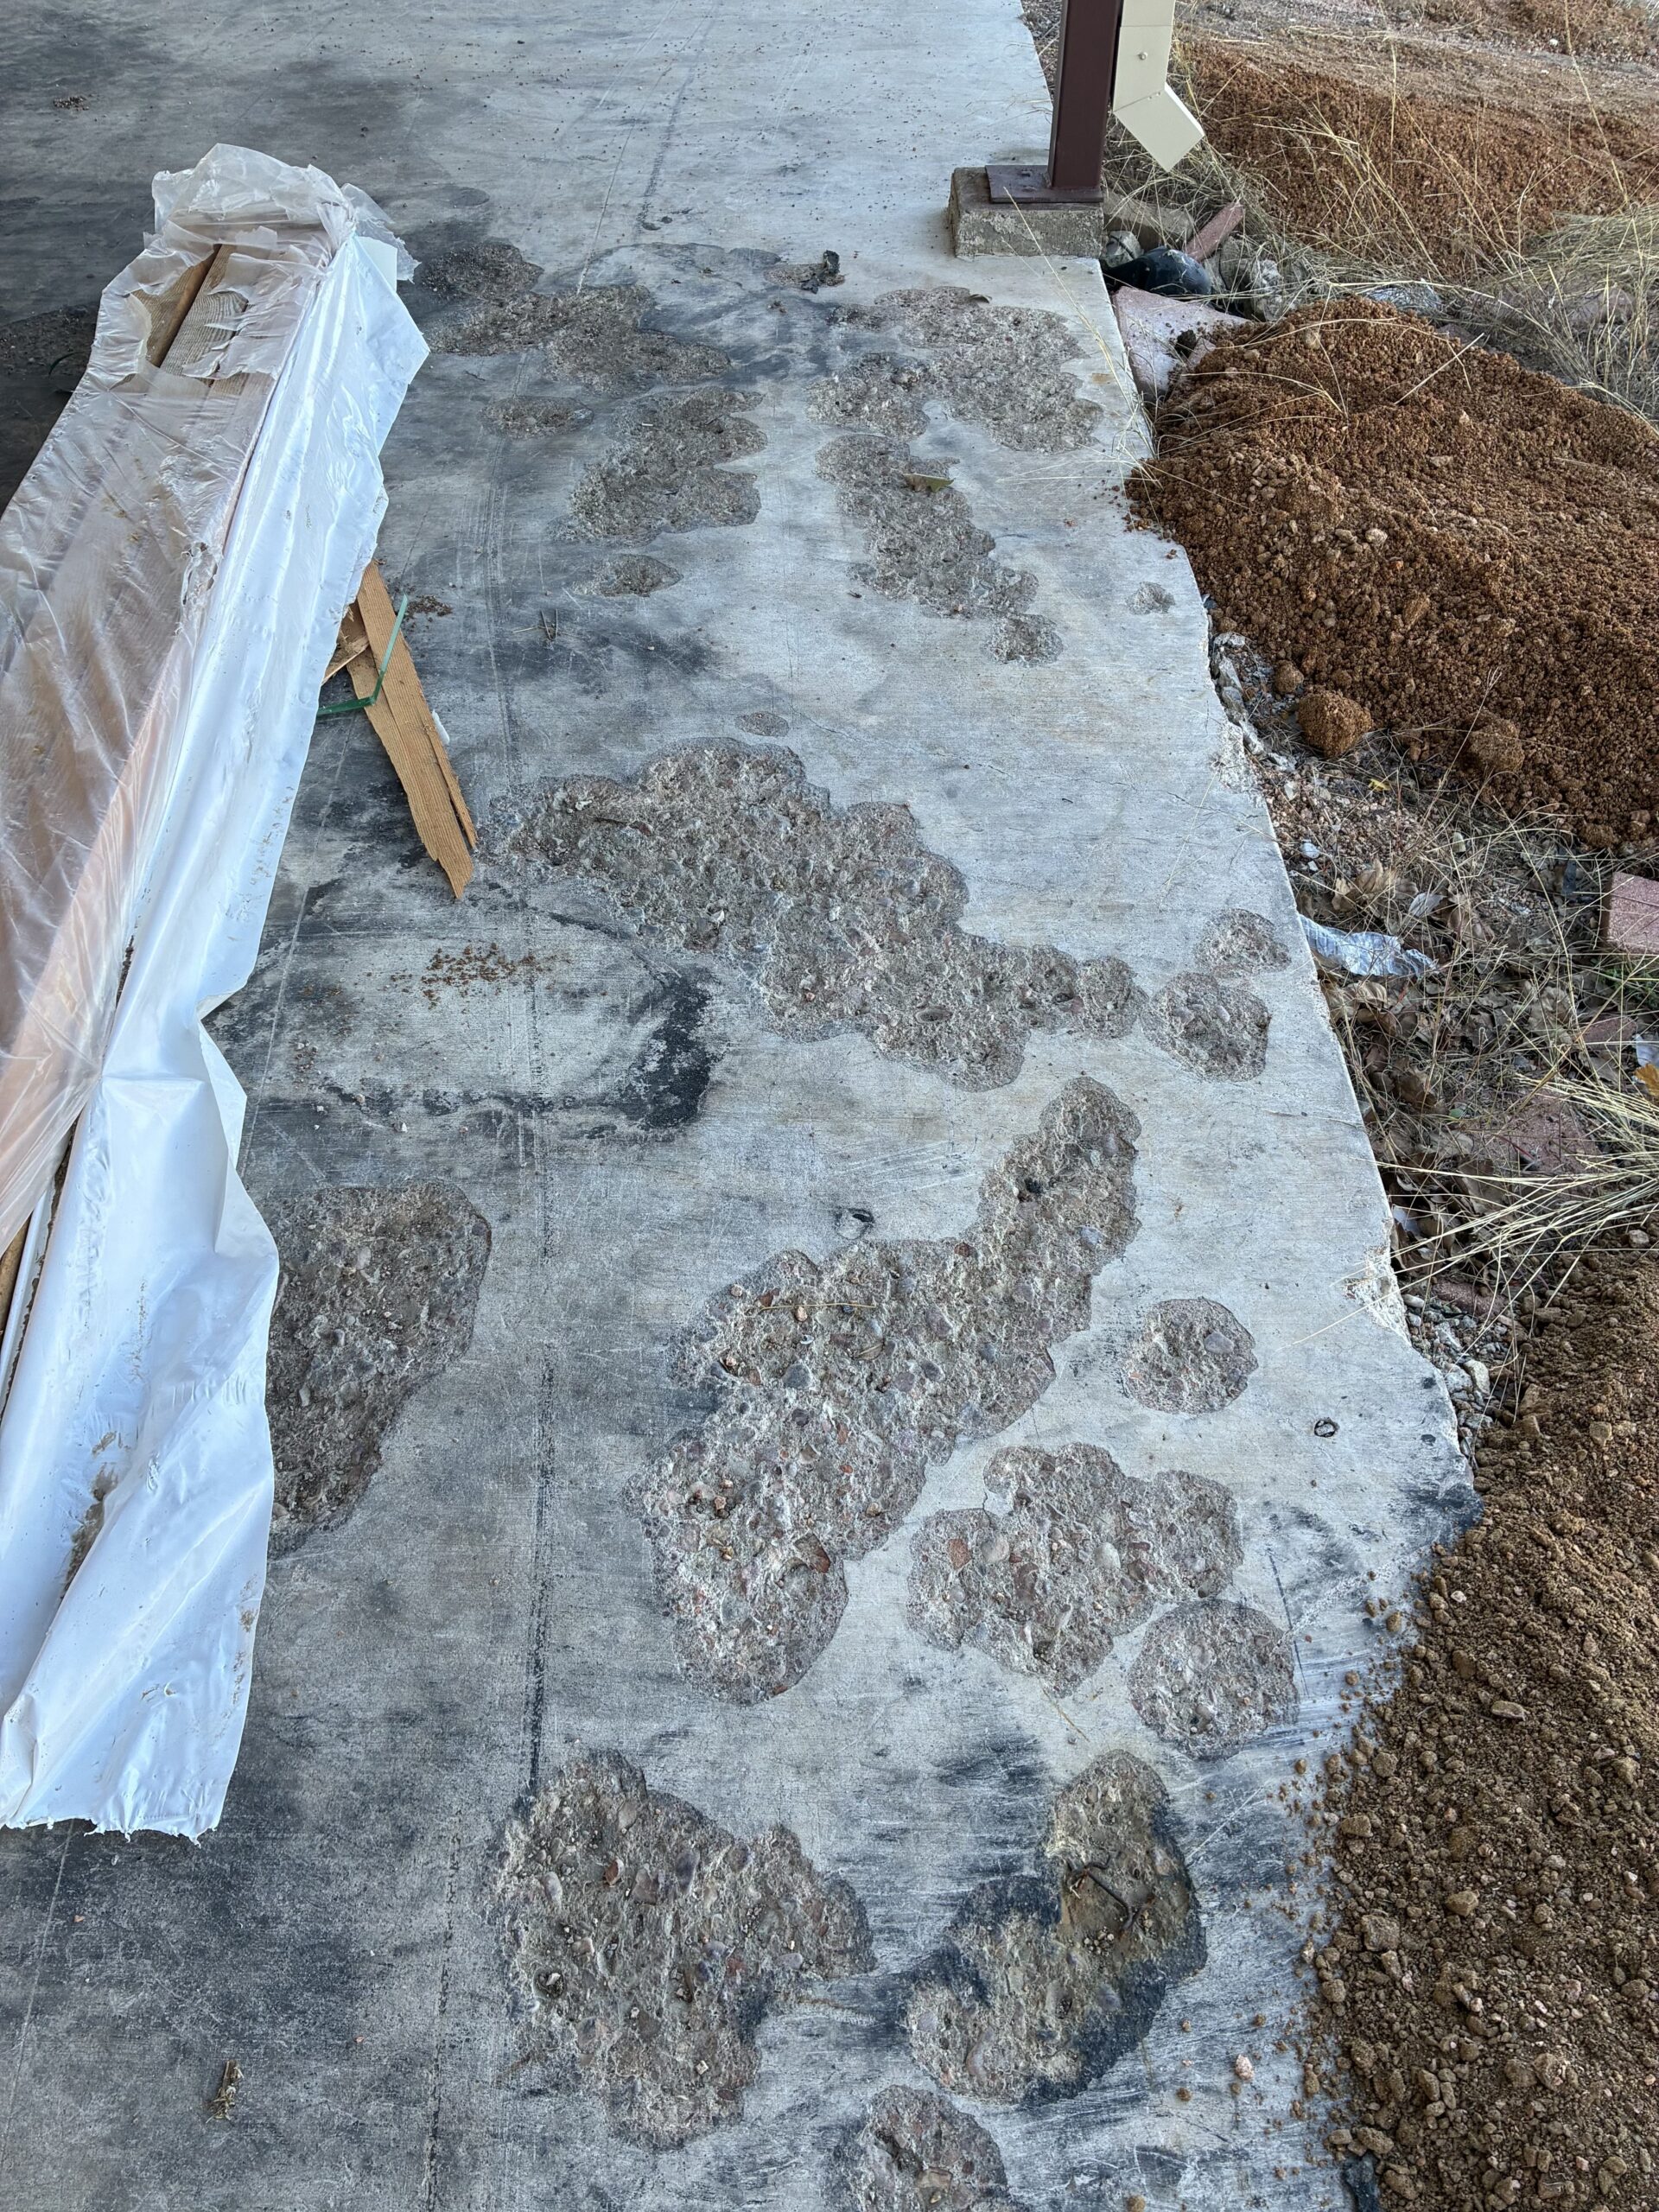
    What Heat-Damaged Concrete Looks Like

    After exposure to extreme heat, you’ll typically see:

    • Exploded surface areas
    • Large missing patches or pop-outs
    • Deep cracking and delamination
    • White, chalky, or brittle surface texture
    • Weak areas that break apart under foot pressure
    • Structural instability if rebar was affected

    This isn’t cosmetic damage, it’s structural.

    How PLC Repairs Heat-Damaged Concrete

    Restoring fire or heat damaged concrete isn’t a simple patch job. It requires a step-by-step process to rebuild strength, ensure adhesion, and prevent future failures.

    Here’s how Private Label Coating does it:

    1. Full Inspection & Sound Testing

    We determine how deep the thermal damage goes using:

    • Hammer testing
    • Moisture checks
    • Delamination mapping
    • Visual & structural evaluation

    If the slab is compromised beyond the surface layer, deeper remediation is needed.

    2. Remove All Weakened Concrete

    All brittle, chalky, or delaminated concrete must be removed.
    This is done with:

    • Mechanical grinding
    • Chipping
    • Surface scarifying

    We continue until we reach sound, stable concrete that will bond properly to repair materials.

    3. Clean & Profile the Slab

    Heat-damaged concrete often becomes dusty, weak, and contaminated.
    PLC opens the pores and creates a proper profile so repair materials can adhere.

    4. Apply Structural Repair Materials

    Depending on the severity of damage, PLC uses:

    • Polymer-modified resurfacing systems
    • High-strength repair mortars
    • Deep patch materials
    • Crack injection or stabilization if needed

    These materials restore structural integrity and outperform traditional patch mixes.

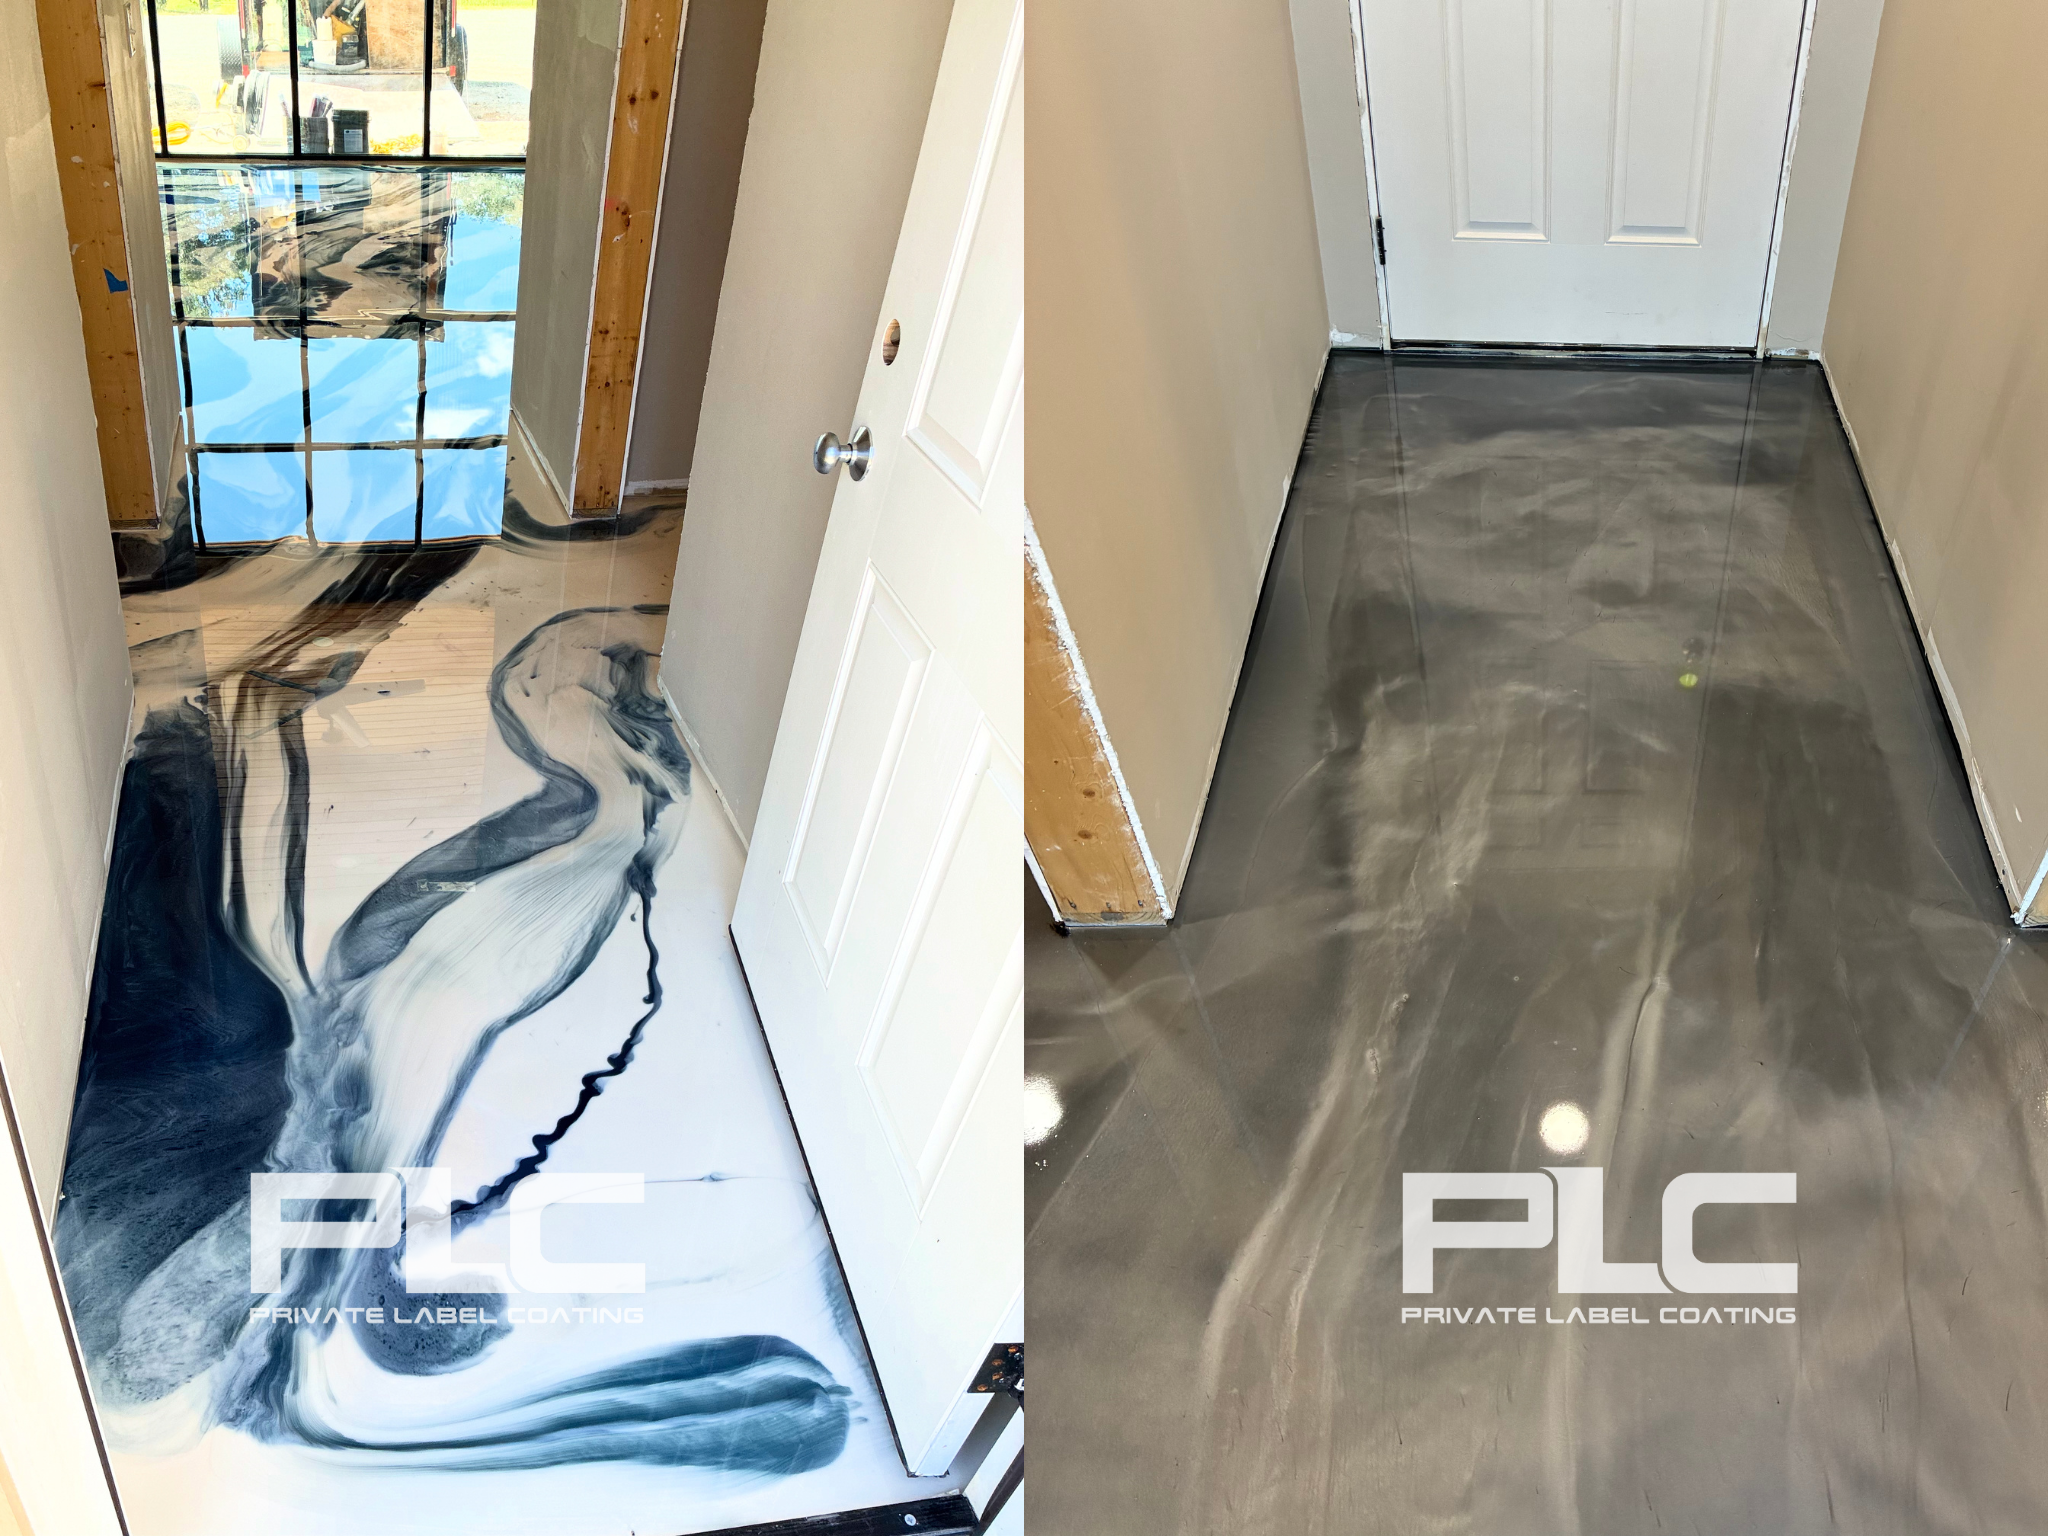
    5. Resurface or Coat for Final Protection

    To prevent future moisture intrusion and strengthen the slab, PLC finishes the repair with one of our advanced systems:

    • Concrete resurfacing overlays
    • Densify/Burnish/Guard system
    • Industrial epoxy systems
    • Polyaspartic topcoats
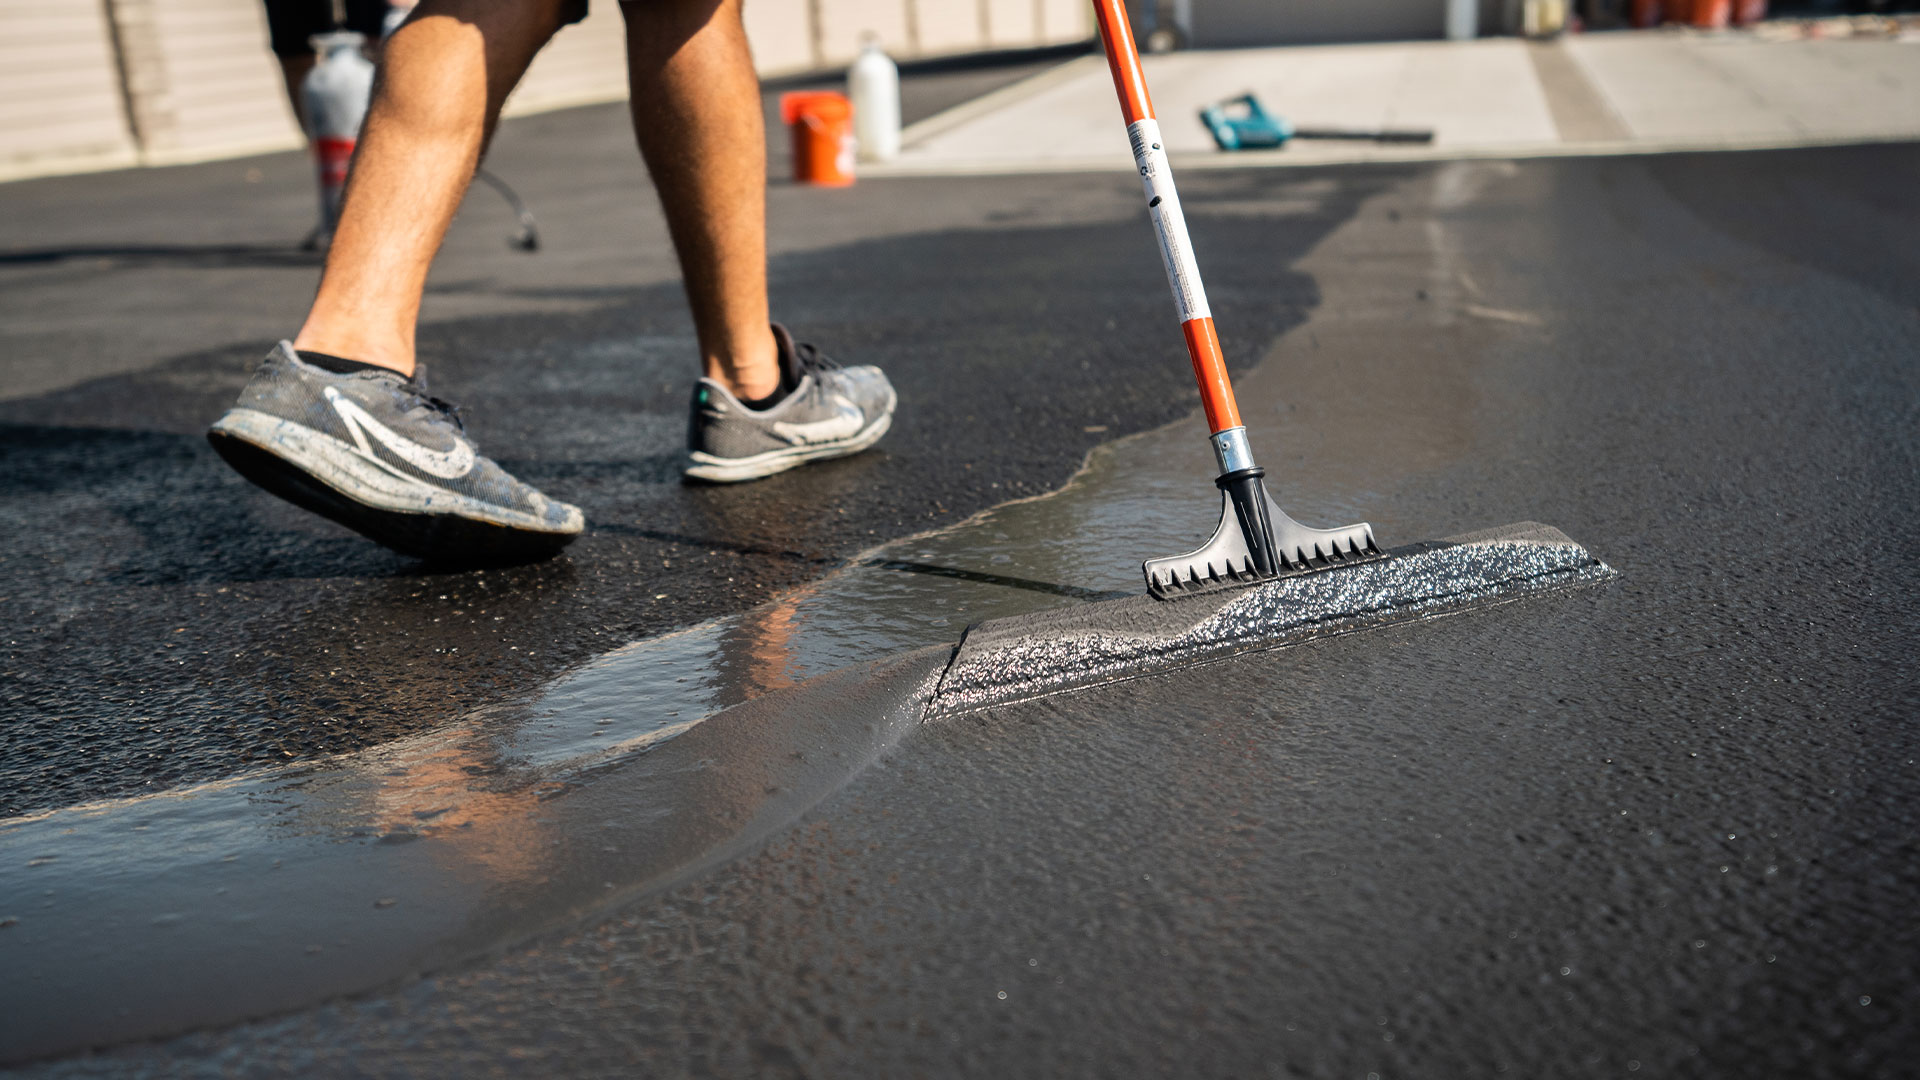
    • Polymer-modified asphalt/concrete restoration (for exterior surfaces)

    This creates a long-lasting, durable surface that resists heat, chemicals, wear, and weather.

    Why This Matters

    Heat-damaged concrete is not something to ignore. Leaving it untreated can cause:

    • Spreading cracks
    • Moisture intrusion
    • Structural weakening
    • Safety hazards
    • Costly future repairs

    With PLC’s restoration systems, the slab is rebuilt to be stronger, safer, and ready for long-term performance.

    Trust PLC With Fire & Heat-Damaged Concrete

    Whether it’s from a fire, industrial equipment, or extreme heat exposure, PLC has the systems and experience to restore concrete the right way, not with surface-level patches that fail within months.

    If you’re dealing with damaged concrete or want an expert assessment, Private Label Coating is here to help.

  • Luxury That Lasts: The Power of Metallic Epoxy Flooring

    Luxury That Lasts: The Power of Metallic Epoxy Flooring

    At Private Label Coating (PLC), we believe a floor can be more than just a surface — it can be a statement. A metallic epoxy floor is exactly that — a one-of-a-kind art piece poured in place. No two floors will ever look alike, and that’s what makes them so captivating.

    The Foundation: Pigmented Primer Matters

    Every metallic floor starts with a pigmented primer coat, and that layer sets the tone — literally — for the entire project.

    The primer color is chosen based on the metallic pigment used above it. A black or charcoal primer, for example, deepens darker metallics like gunmetal, bronze, or copper, while a white or light gray primer brightens silvers, pearls, and lighter tones.

    Think of it like the underpainting of a canvas — it influences how the final colors blend, pop, and move. Choosing the right base color is one of the most important design steps, because it determines how dramatic or subtle the finished floor will appear.

    The Metallic Magic

    When the metallic epoxy is applied, the pigments move, swirl, and settle in organic patterns. The installer manipulates the material to create depth, contrast, and flow.

    If multiple metallic colors are used — say, silver, bronze, and sapphire — the design can become very “loud” or bold, with high visual contrast and fluid motion. Using one or two tones creates a more refined, elegant look.

    It’s all about the client’s vision. Some want a floor that looks like flowing lava or stormy clouds; others prefer a sleek brushed-metal aesthetic.

    Durability Beyond Beauty

    Don’t let the artistry fool you — a metallic epoxy floor is also industrial-grade tough. Once cured, it forms a seamless, chemical-resistant, and abrasion-resistant surface that can withstand heavy traffic.

    It’s a popular choice for showrooms, garages, retail spaces, and high-end homes alike because it performs as beautifully as it looks.

    Timing & Recoat Windows

    Because metallic epoxy is a multi-step system, timing is everything. Each layer — primer, metallic coat, and topcoat — has a specific recoat window, usually within 12–24 hours depending on temperature and product chemistry.

    Missing that window can cause bonding issues, so professional scheduling and controlled environments are key to achieving a flawless finish.

    What Customers Should Know

    Metallic epoxy is not for everyone — and that’s part of its appeal.

    Here are a few things to consider before diving in:

        •    Variations are natural. No two floors will ever match exactly — it’s part of the artistic process.

        •    Surface movement is unpredictable. The pigments flow differently each time, influenced by temperature, humidity, and application technique.

        •    Repairs and touch-ups can be challenging to blend perfectly due to the unique color shifts and layering.

        •    Gloss levels can vary slightly, and minor waves or visual texture are part of the handcrafted look.

    Your Custom Floor, Your Art Piece

    When you choose PLC for your metallic floor, you’re not buying a product — you’re commissioning a custom work of art built to last.

    Every pour is personal. Every swirl tells a story.

    We’ll guide you through every decision — from the pigmented primer selection to the final clear coat — ensuring your floor is both functional and unforgettable.

    Private Label Coating (PLC)

    Where Performance Meets Personality.

  • Innovative Concrete Solutions: PLC Smart Shine & Dye Polish Systems

    Innovative Concrete Solutions: PLC Smart Shine & Dye Polish Systems

    Concrete doesn’t have to be plain or purely functional. With the right treatment, it can become a showpiece that enhances both the performance and the look of your space.

    At Private Label Coating (PLC), we specialize in advanced systems that bring out the very best in concrete surfaces — indoors and outdoors. Two of our most versatile solutions are the PLC Smart Shine System and the PLC Dye Polish System, each designed with durability, beauty, and long-term value in mind.


    PLC Smart Shine System: Exterior Protection with Natural Beauty

    Outdoor concrete surfaces take a beating. From the blazing Texas sun to heavy rain and everyday wear, they need a finish that can handle the elements without losing their appeal.

    That’s where the PLC Smart Shine System comes in. This system is specifically designed to enhance and protect exterior concrete while maintaining the natural beauty of a power-troweled finish.

    Here’s what it delivers:

    • Low Maintenance – Reduces dusting and minimizes the upkeep typically required for untreated concrete.
    • Subtle Sheen – Provides a clean, polished look that elevates patios, walkways, pool decks, and other outdoor spaces.
    • Longevity – Creates a stronger surface that lasts for years, even under tough environmental conditions.

    The result? A bright surface that looks natural and clean with a slight sheen — but has the strength and resistance to stand up to Texas weather and everyday life.


    PLC Dye Polish System: Vibrant Interiors That Last

    When it comes to interior spaces, concrete doesn’t just need to perform — it should also make a statement.

    The PLC Dye Polish System is the perfect solution for transforming indoor concrete into a refined, high-performance surface with vibrant color and a long-lasting polished finish.

    This system combines PLC’s advanced honing process along with densifiers and penetrating dyes to create floors that are:

    • Beautifully Colored – Adds depth, vibrancy, and personality while enhancing the concrete’s natural character.
    • Durable and Polished – The smooth, refined finish resists abrasion, staining, and wear, even in high-traffic areas.
    • Light-Reflective – Polished concrete improves interior brightness, making spaces feel larger, cleaner, and more inviting.
    • Versatile – Ideal for retail, commercial, office, and residential interiors.

    Every installation results in a signature look — one that is sleek, stylish, and built to last.


    Why Builders, Designers, and Property Owners Choose PLC

    Whether you’re breaking ground on new construction, renovating an existing property, or simply looking for ways to improve your concrete surfaces, PLC is your partner in surface innovation.

    We offer solutions that:

    • Protect exterior slabs against the elements
    • Transform interior spaces with color and polish
    • Deliver durability, low maintenance, and long-term value
    • Elevate design without compromising performance

    From specialty coatings to complete resurfacing systems, PLC has the experience, tools, and expertise to help you achieve your vision.

    Ready to see what’s possible for your project? Contact Private Label Coating today to learn how our systems can transform your concrete into a surface that performs beautifully for years to come.

  • How to Get Stronger, Shinier, Longer-Lasting Concrete Floors with PLC

    How to Get Stronger, Shinier, Longer-Lasting Concrete Floors with PLC

    Concrete floors are tough by nature — but with the right treatment, they can also be beautiful, low-maintenance, and built to last for decades. That’s exactly what Private Label Coating’s Smart Shine System delivers.

    This multi-step process transforms ordinary concrete into a refined, high-gloss surface that resists stains, holds up against heavy traffic, and elevates the look of any space. Whether in a retail store, warehouse, office, or modern home, this system provides the perfect balance of durability and design.

    Step 1: Clean and Prepare the Surface

    Every great floor starts with proper preparation. PLC begins by thoroughly cleaning the concrete surface to remove dust, dirt, and light contaminants. This ensures the floor is ready to absorb treatments evenly and perform at its best.

    Step 2: Apply PLC Stone lock 

    PLC StoneLock™ is a concrete densifier that penetrates deep into the slab and chemically reacts with the calcium hydroxide in the concrete. This reaction forms calcium silicate hydrate (CSH), which fills in pores and capillaries. The result is a surface that is:

    Harder and denser – increased abrasion resistance and durability

    Less porous – better protection against dusting and wear

    Long-lasting – creates a stronger foundation for polishing or sealing.

    Step 3: Burnish the Floor

    Next comes the first burnishing pass — using high-speed equipment to refine the surface and prepare it for the protective guard. This step helps smooth the concrete, close pores, and set the stage for an even, uniform application.

    Step 4: Apply PLC DeepShield™

     PLC DeepShield™  is a penetrating sealer applied to the surface to provide:

    • Enhanced stain resistance (from spills, oils, and chemicals)
    • Wear protection in high-traffic areas
    • A more refined, polished appearance

    This layer acts like a shield — protecting your investment and keeping your floor looking sharp.

    Step 5: Final Burnish with PLC Eco-Sheen Pad.

    To finish, PLC performs a final burnish using the Eco-Sheen pad. This step creates a uniform gloss,  that reflects light beautifully and gives the floor that sleek, professional look.

    The result? A floor that’s not just functional, but eye-catching.

    What the Final Floor Looks Like

    After the Densify/Burnish/Guard process, your floor will:

    • Have a brilliant, mirror-like shine that elevates the entire space
    • Feel smooth, refined, and professional underfoot
    • Resist stains, dust, and wear far better than untreated concrete
    • Reflect natural and artificial light, brightening up interiors

    Why Choose the Densify/Burnish/Guard System?

    This system is ideal for anyone who wants concrete that’s:

    • Low-maintenance – Easy to clean without constant waxing or stripping
    • Durable – Built to withstand forklifts, foot traffic, and spills
    • Cost-effective – Lower lifetime costs compared to alternative flooring systems
    • Environmentally friendly – No harsh coatings or coverings, just the natural strength of your concrete enhanced and protected

    Why Trust Private Label Coating?

    At PLC, we don’t cut corners — we execute every step with precision. Our experienced team understands the science of concrete and uses proven systems to deliver lasting results. The Densify/Burnish/Guard process is not just about creating a beautiful floor — it’s about creating a floor that will perform for years to come.

    👉 Ready to transform your concrete into a strong, glossy, and stain-resistant surface? Contact Private Label Coating today to learn more about the Densify/Burnish/Guard System.

  • Why Every Stained Concrete Floor Looks Different — And How to Get the Look You Want

    Why Every Stained Concrete Floor Looks Different — And How to Get the Look You Want

    When it comes to stained polished concrete, no two floors are ever exactly alike — and that’s part of the beauty. Stains bring depth, warmth, and character to a space, but they also interact with each concrete slab in unique ways. If you’ve ever wondered why a stain might look slightly different from a sample or project photo, the answer lies in the natural variation of concrete itself.

    At Private Label Coating, we believe in educating clients so they know what to expect and can fully appreciate the one-of-a-kind results that stained concrete delivers.

    1. The Nature of the Slab

    Concrete is never a perfectly uniform material. Its color, density, and surface texture are influenced by:

    • Mix design (cement, aggregates, and additives used)
    • Age of the concrete (newer slabs may absorb differently than older ones)
    • Moisture content at the time of staining

    All of these factors change how a stain penetrates and reacts, meaning even two floors poured on the same day can finish with slightly different tones.

    2. Porosity Plays a Big Role

    The more porous the concrete, the deeper the stain can penetrate. Dense, tightly finished slabs may take stain lightly, resulting in softer, more subtle color. On the other hand, a more open or porous surface can create richer, darker hues.

    This variation is what gives stained polished concrete its artistic, organic feel — you’ll never get a “flat” or cookie-cutter look.

    3. Surface Preparation Matters

    How the surface is prepped before staining makes a huge difference. At PLC, we carefully grind, clean, and prep the slab so it’s ready to accept stain evenly. Any residue, sealers, or imperfections left behind can block absorption in spots, which is why professional prep is essential for a clean finish.

    4. Finish Levels Change the Look

    Stained concrete comes in different sheen levels — matte, satin, or high-gloss. The high gloss, the more light reflects, and the richer and more translucent the stain appears. Matte finish levels give a softer, earthier look. 

    5. The Beauty of One-of-a-Kind Floors

    Some people expect stain to look exactly like paint — solid and uniform. But that’s not the purpose of concrete stain. Instead, it highlights natural variation, bringing movement, depth, and character into the floor. The results are often compared to stone, leather, or marble.

    That’s why no two stained polished concrete projects will ever be identical. Each slab tells its own story.

    Stained Concrete Color Trends for 2025

    Stained polished concrete isn’t just durable — it’s stylish. Here are some of the most popular stain colors clients are requesting right now:

    • Coffee & Mocha Browns
      Rich, earthy tones that create warmth and elegance. Perfect for residential living spaces or commercial settings that want a grounded, natural look.
    • Warm Gray & Greige
      A modern favorite, blending gray with subtle brown undertones for a sleek but welcoming feel. Works beautifully in retail, office, and contemporary homes.
    • Charcoal & Black Marble Effects
      Darker stains are trending for bold, upscale designs. When polished to a high gloss, these floors can resemble luxury stone or marble.
    • Copper & Bronze Accents
      Metallic-inspired stains that catch light and bring energy to the floor. A top choice for restaurants, breweries, and boutique retail spaces.
    • Soft Sandstone & Taupe
      Neutral tones that mimic natural stone, offering timeless appeal and pairing well with any design style.
    • Deep Blue & Teal Highlights
      While more niche, these dyes/stains are growing in popularity for creative projects — adding pops of color to artistic, branded, or statement-making floors.

    Why Trust PLC for Stained Polished Concrete

    With years of experience, Private Label Coating understands how to anticipate and manage variation for stunning results. We choose the right products, prepare the surface meticulously, and communicate with clients every step of the way so the final floor is something they’ll love for decades.

    Thinking about stained polished concrete for your home or business? Contact PLC today and let’s bring out the natural beauty of your concrete.

  • Texas Heat Can Ruin Your Concrete Coating — Unless You Know These Pro Secrets

    Texas Heat Can Ruin Your Concrete Coating — Unless You Know These Pro Secrets

    Texas summers don’t mess around. With temperatures regularly soaring into the triple digits, it’s not just people and pets who feel the heat — your concrete coatings do, too. Whether it’s epoxy, polyaspartic, or overlay systems, high heat can dramatically shorten cure times and reduce your margin for error.

    In these conditions, you don’t just need any crew — you need a team that knows exactly how to work smart, fast, and right the first time. That’s where Private Label Coating comes in.


    Heat Changes Everything

    Concrete coatings and overlay systems are designed to cure within a specific temperature range, usually around 70°F to 85°F. But in the Texas sun? You’re often working on a slab that’s 100°F or hotter by mid-morning — and that changes the entire game.

    When temperatures spike:

    • Epoxies begin to cure too quickly, reducing your working time and increasing the risk of roller marks or uneven finishes.
    • Polyaspartics, already known for their fast cure times, can flash cure in minutes — leaving no time for error or correction.
    • Overlays and microtoppings can dry too rapidly to properly bond, leading to cracks, flaking, or outright failure.

    High temps also affect moisture evaporation, increasing the risk of trapped air, bubbles, or delamination. What you get is a rushed application and a vulnerable floor — unless you know how to handle it.


    Inexperience Shows in the Heat

    When materials cure faster than expected, there’s no room for hesitation. The difference between a flawless floor and a costly do-over often comes down to timing, prep, and technique.

    Inexperienced crews may:

    • Mix large batches that cure before they’re applied
    • Fail to adjust for slab temperatures or humidity
    • Leave behind visual defects or structural weaknesses

    And with Texas clients expecting top-tier results, there’s simply no excuse for a job that doesn’t hold up.


    How PLC Works Smarter (and Faster) in the Heat

    At Private Label Coating, we’ve spent years mastering the art of concrete coatings — and that includes working in Texas’ most extreme temperatures. Our methods are built for this climate:

    • Small batch mixing to extend working time
    • Adjusting product ratios where appropriate for temperature-specific applications
    • Working in cooler windows — early mornings, evenings, or overnight as needed
    • Using shade structures or tenting where possible to reduce surface heat
    • Fast, skilled teams that know how to move quickly without compromising quality

    We don’t guess — we know. And we bring that precision to every slab, every coat, and every finish.


    Count on Private Label Coating to Get It Done Right

    When heat threatens the outcome of your project, you need more than good intentions — you need proven expertise. At Private Label Coating, we don’t cut corners, and we don’t miss deadlines. We adapt to the elements, protect your investment, and deliver results that hold up long after the heat has passed.

    Ready to schedule your summer project?
    Let’s talk. We’ll show you what it means to work with pros who are built for Texas.

  • What to Know About Polyaspartic Coatings: Performance, Price & Precision

    What to Know About Polyaspartic Coatings: Performance, Price & Precision

    When it comes to high-performance concrete coatings, polyaspartic has become a go-to for clients needing quick turnaround, durability, and a clean, modern finish. But while it offers major advantages in the right settings, it’s not the best choice for every project — especially for aviation hangars.

    What Is Polyaspartic?

    Polyaspartic is a fast-curing, UV-stable, polyurea-based coating that delivers:

    • 1–2 hour cure times
    • Excellent chemical and abrasion resistance
    • Long-lasting clarity and flexibility
    • Next-day return to service

    It’s ideal for garages, patios, commercial spaces, and even industrial floors — but not every environment benefits equally.

    Why Polyaspartic Isn’t Ideal for Aviation Hangars

    In hangars or aircraft maintenance environments, a polyaspartic-only system simply doesn’t hold up the way a proper multi-layer epoxy system does. Here’s why:

    Jet Fuel & Hydraulic Fluid Resistance:
    Polyaspartics can resist many chemicals, but aviation-grade fluids like Skydrol and jet fuel can break them down over time. A 100% solids epoxy system with a urethane topcoat provides superior long-term resistance.

    Film Build & Thickness:
    Polyaspartic systems are often applied thin (8–12 mils). Hangar floors require heavier build coats (20–40+ mils) to withstand heavy equipment, impact, and chemical loads.

    Layered Defense Matters:
    A three-layer system — typically primer, 100% solids epoxy build coat, and urethane or polyaspartic topcoat — offers:

    • Stronger chemical resistance
    • Higher impact durability
    • Longer service life
    • Easier repair and maintenance

    Cost vs. Longevity:
    While polyaspartic is faster and often more expensive upfront, epoxy systems are more cost-effective over time in demanding environments like aviation hangars.

    Bottom Line: Match the System to the Setting

    Polyaspartic is a premium coating option for the right project — but in aviation, where fuel, fluid, and function are critical, a high-build epoxy system with proper layering is the gold standard.

  • How to Prep Concrete for Polishing: Why It Matters More Than You Think

    How to Prep Concrete for Polishing: Why It Matters More Than You Think

    Polished concrete floors are known for their sleek, durable finish and low maintenance appeal—but achieving that flawless result starts long before the shine. Proper concrete surface preparation is one of the most critical steps in the polishing process. Without it, even the most high-end polishing equipment or sealers won’t perform as expected.

    In this post, we’ll walk through what concrete prep involves, why it’s so important, and what you can expect when you hire a professional to do it right.

    Why Concrete Prep Is Essential Before Polishing

    Concrete polishing is not just a cosmetic procedure—it’s a multi-step mechanical process that requires a clean, uniform, and structurally sound surface. Skipping or rushing the prep stage can result in:

    • Uneven sheen or gloss
    • Exposed cracks or imperfections
    • Poor adhesion of densifiers or sealers
    • Reduced durability and lifespan

    At Private Label Coating, we take preparation seriously. Our goal is to create a smooth, defect-free surface that’s ready to take on the polishing process and hold up for years to come.

    Key Steps in Prepping Concrete for Polish

    1. Surface Cleaning & Debris Removal

    Before anything else, we clean the surface thoroughly. This includes sweeping, degreasing, and removing any adhesives, coatings, paints, or surface residues that may interfere with the grinding or polishing stages.

    2. Moisture Testing

    If moisture levels are too high, it can affect polishing results and lead to long-term issues like delamination or hazing. We check for vapor transmission and recommend moisture mitigation if necessary.

    3. Crack Repair & Patching

    Visible cracks or holes in the concrete are filled or repaired using specialized patching materials. These areas are then blended in to ensure they don’t stand out after polishing.

    4. Grinding with Metal Bond Tools

    We use industrial-grade grinders with metal bond diamond tooling to open the concrete’s surface. This step removes surface inconsistencies, old coatings, and helps flatten the slab, setting the stage for even polishing.

    5. Surface Profiling

    Depending on the level of gloss or aggregate exposure you want, we adjust our grinding process accordingly. This is when the final profile of your concrete begins to take shape.

    What to Expect from a Professional Prep Job

    When you hire Private Label Coating, you’re not just getting someone to run a grinder. You’re getting a precision-driven process tailored to your space and surface goals.

    Every project includes:

    • Site inspection and surface evaluation
    • Moisture and hardness testing (as needed)
    • Equipment and tooling selection specific to your concrete condition
    • Safety and dust control measures throughout

    Prep Today for a Better Finish Tomorrow

    The beauty and performance of polished concrete rely heavily on the prep work beneath it. If you want lasting shine, durability, and professional results, don’t cut corners—start with the right prep.

    Interested in learning more or getting a quote for your project?
    Contact Private Label Coating today to schedule a consultation.

  • Lock Out Moisture, Lock In Beauty: Why Slate Tile Needs Sealing Now

    Lock Out Moisture, Lock In Beauty: Why Slate Tile Needs Sealing Now

    Slate tile is a beautiful, durable choice for bathroom surfaces—but like many natural stones, it’s also porous. That means it can absorb moisture if left unsealed, leading to a host of issues like mildew, mold, staining, and gradual breakdown. At Private Label Coating, we’re currently sealing slate tile in 12 bathrooms for a commercial client, and it’s a perfect example of why proper sealing is so important—especially in high-use, high-moisture environments.

    The Problem with Unsealed Slate in Wet Areas

    Natural slate contains tiny pores that easily absorb water, soap residue, and grime. In a space like a bathroom—where humidity and water exposure are constant—this can lead to:

    • Mildew and mold growth
    • Unsightly staining and discoloration
    • Efflorescence, the chalky white residue from mineral buildup
    • Flaking or surface erosion of the stone over time
    • Musty odors from moisture trapped beneath the surface

    Without a proper sealer, even the most beautiful slate can become stained, discolored, or structurally compromised.

    The Benefits of Sealing Slate Tile

    Sealing slate acts as a barrier against water, grime, and microorganisms—all while enhancing the stone’s natural beauty. Key benefits include:

    • Prevents mildew, mold, and bacterial growth
    • Protects against stains from water, soap, and everyday use
    • Simplifies cleaning—sealed tile is easier to wipe down and maintain
    • Preserves color and texture, with options for natural or enhanced finishes
    • Extends the life of both the tile and grout

    We use a high-performance antimicrobial sealer that’s specifically formulated for wet environments like bathrooms, spas, and showers. It not only repels water and grime, but also inhibits the growth of bacteria and mold—making it ideal for environments with constant moisture exposure.

    Our Sealing Process

    At Private Label Coating, we follow a professional process for maximum protection and lasting results:

    1. Preparation: We deep-clean the tile and grout, removing buildup, residue, and early signs of mildew.
    2. Dry Time: Surfaces are thoroughly dried to ensure optimal sealer bonding.
    3. Application: We apply a premium penetrating sealer that creates a breathable, water-repellent barrier and delivers antimicrobial protection.
    4. Curing: The sealer is allowed to cure fully, typically within 24 hours, before the space is put back into use.

    For clients seeking a bold, rich look, we also offer enhancing sealers that deepen the color and bring out the natural texture of slate.

    Residential vs. Commercial Sealing

    The frequency of resealing depends on how much wear and moisture the surface is exposed to. In commercial or industrial bathrooms, where traffic and moisture are constant, we recommend resealing every 1–2 years.

    In residential bathrooms, where slate experiences less exposure, a quality seal can last several years before needing to be reapplied.

    Tip: To check if it’s time to reseal, simply splash water on the tile. If it soaks in instead of beading up, it’s time for a refresh.

    Maintenance Tips for Sealed Slate

    To help your sealed slate last:

    • Use pH-neutral cleaners made for natural stone
    • Avoid vinegar, bleach, or abrasive cleaners
    • Wipe down wet areas regularly to reduce water buildup
    • Stick to a resealing schedule based on usage

    Final Thoughts

    Sealing slate tile isn’t just about looks—it’s about protecting your space from moisture damage and harmful growth. Our antimicrobial sealer is built for high-moisture environments, giving your tile the defense it needs to stay clean, beautiful, and long-lasting.

    Need your slate tile sealed or resealed? Contact Private Label Coating today to get a free quote or schedule a site visit. We’re here to help protect your surfaces—starting with what matters most.